Difference between stitch and knit
The Difference Between Knit and Pearl Stitch is explained as follows:
When I learned to knit, the first project I took on was a sweater (I never work easily). The ribbing was the hardest part for me because I couldn’t tell the difference between a knit stitch and a purl stitch. It wasn’t until the next row that I knew I messed up, but by then it was too late. When I finally realized that I had made a wrong stitch, I had to get out and start over.
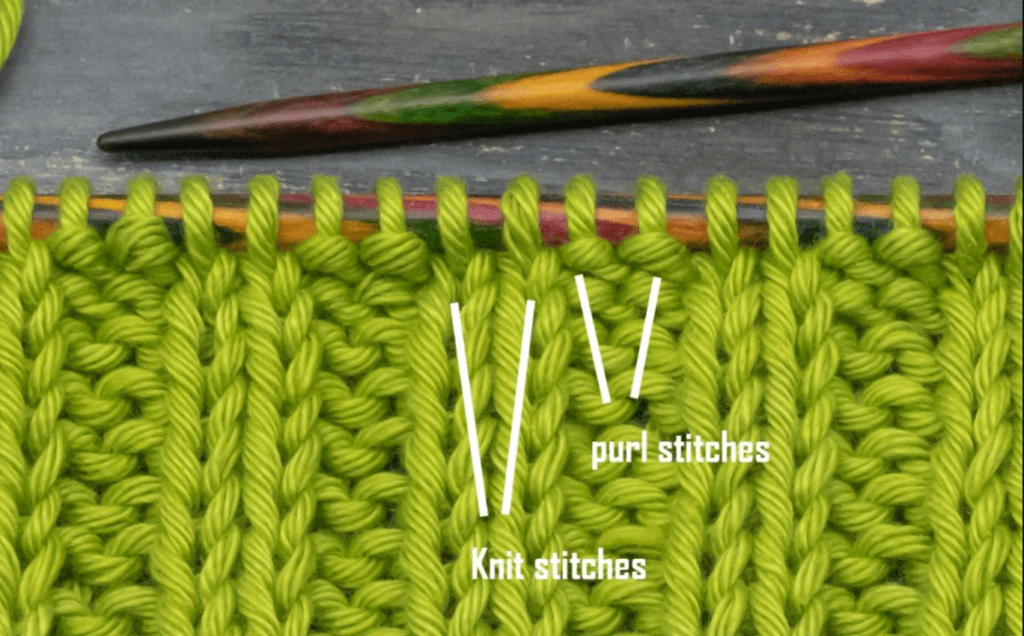
Knit and purl stitches are made differently and have different shapes. Knit stitches are made with the yarn held behind the needle and look like a V when knitted. Purl stitches are made with the yarn placed in front of the needles creating a horizontal stripe at the bottom of the stitch.
Knitting is easy. All you need to know to knit and purl stitches. Simply, everything else is a combination of the two.
However, what makes knitting difficult and why people give up, is that they (myself included when I started) don’t know how to “read” their stitches. Taking the time to study the shape of stitches on and off the needles is very rewarding.
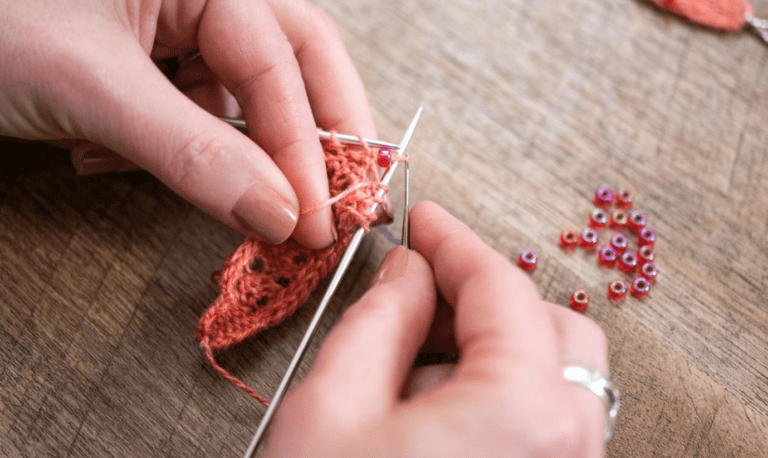
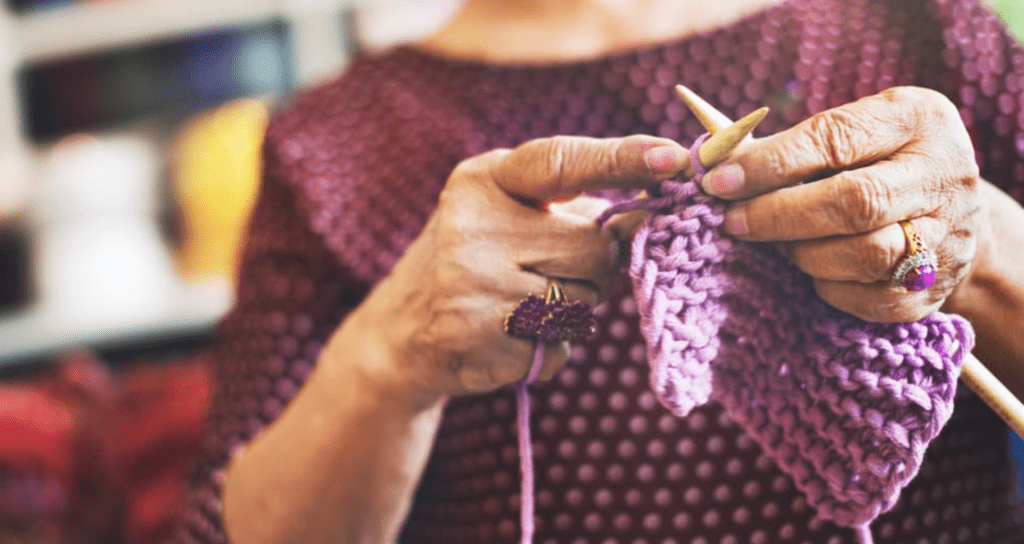
I’ve created this simple guide as you begin your knitting journey. Let me tell you the difference between knit stitch and purl stitch. And I urge you to grab a set of needles and some yarn so you can join me for some practice!
Knitted stitch
Let’s start with the knit stitch. This is the most basic stitch for knitting. Everyone should know this stitch and it is often the first stitch learned. Let me quickly show you how to do it.
How to make a knit stitch
- Make the required number of stitches. For some help, I have a link to this YouTube video that will walk you through the cast. This is the subject of another article.
- Hold the working needle (empty needle) in your right hand and the other needle in your left hand.
- Use a working needle and insert the tip into the first stitch. Your needle should move away from you.
- Put the yarn on the needle working from the back side.
- Bring the needle back through the loop to the front. Hold the yarn you have on the tip all the way through.
- You should have a loop on the working needle.
- Continue this process until you run out of stitches.
How to do steps 2-4, threading and threading the needle.
How to do steps 5-6. Then continue this process for the rest of the row.
See how easy it was?! You’ve just made your first row of knitting stitches!
Well I’m a continental knitter so I hold the yarn in my left hand. You can do exactly as I show in the pictures with the yarn held in your right hand.
Now let’s take the process apart and look at your work so you can understand the basic construction of the knit stitch.
Knitted stitch structure
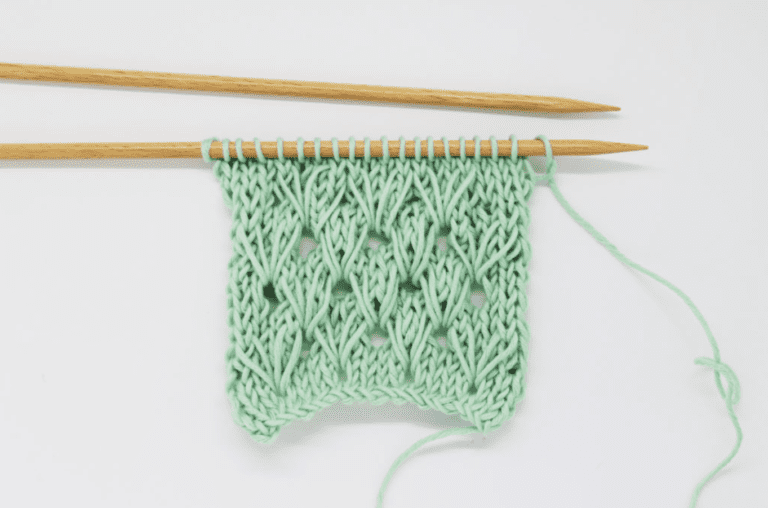
I went ahead and made a few more rows so we could see the knitting a little better. First, let’s look at the shape of the fabric. A knit stitch creates a stretchy fabric made up of stitches that look like “v’s.” Take a look at the picture and just absorb it for a second. This is the right side of the fabric for knitting.
Now let’s turn our attention to the topmost loops on the needle. When you see them as they are shown in the picture above, they just look like vertical lines of yarn. Nothing special.
If you slide the first stitch a bit, there is a lot to observe. You’ll notice that the front part of the loop (closest to you) bends to the right, while the back part bends the opposite way. It is called western knitting. I have a picture below to illustrate this concept. I put my finger behind the stitch to make it easier to see.
You must be wondering why I bothered to show you this. Trust me, it’s important. If stitches ever fall off the needle, you need to know how to put them back on the hook correctly. If the stitch is done in the opposite direction, the front leg will bend to the left and this is called eastern knitting. You will notice resistance when you try to make a knit stitch. However, it’s perfectly normal to knit the other way around as well.
I think that pretty much sums up the stitch made from it. It’s time to move on to the next important stitch, the purl stitch.
Purl stitch
When you get to the end of your first row of knit stitches (when using straight needles), you’ll quickly notice that the back side looks nothing like the front side. The reverse of the knit stitch is called the purl stitch. Instead of “v’s”, each stitch has horizontal ridges at the bottom. Let’s look at it a little further.
How to make a purl stitch
- Just like we went through the knit stitch, I want to walk you through the purl stitch so we can see the difference.
- Hold the working needle (empty needle) in your right hand and the other needle in your left hand.
- Use a working needle and insert the tip into the first stitch from the back. Your needle should be pointing toward you.
- Put the yarn on the working needle from the front side.
- Bring the needle back through the loop. Hold the yarn you have on the tip all the way through.
- You should have a loop on the working needle.
- Continue this process until you run out of stitches.
It shows steps 1-4.
Close-up of steps 4-5. Then repeat for the rest of the row.
Not so hard, right? Some people argue that pursuing takes longer or is more difficult than a knit stitch, but I think it’s actually a very simple stitch.
Now that you are a pearl stitch expert, let’s take a look at your work and understand the basic construction of pearl stitch.
Purl stitch structure
For this part, I’m just going to flip over my piece and show you the pearl side. Pearl stitch looks like many horizontal wavy lines. Look at the picture. It looks completely different from the knit stitch we saw earlier.
I’m now going to show a close-up of the loops attached to the needle. They look very similar to a knit stitch, except look at how the stitches line up. This is because purl stitches are made with the yarn placed in front.
We can look at individual stitches in the same way we did with knitted stitches. You will notice that the front leg of the stitch (the part closest to you) is bent to the right. This is the direction the knit stitches point to the leading leg as well. Purl stitch just looks like a triangle.
These are the basics of purl stitching. In the following section, we’re going to knit both stitches in the same row and take a look at how to tell the difference.
Tell the difference between knit and purl stitch when combined
In this section, we’re going to make a rib because this stitch combination includes both knit and purl stitches. This is where it is important to tell the difference.
I speak from experience. My problem usually happens when I place my knitting in the middle of the row. I’ll forget if I left out a purl or knit stitch. I finally got tired of ripping my work because I guessed wrong, so I took a look to see if there were any gaps between the stitches. Turns out there is.
If you’re still following along, I want you to make 2×2 ribbing. This means you knit 2 then purl 2 and continue the pattern for the entire row. When you’re done, it should look something like the image below.
Now we will apply what we have learned in the first two parts of this post. What did needlework and purl stitch look like? Under one of them was a line…
The easiest thing to find are the ridges created by the purl stitch. This is your cue to make purl stitches on top of them. So that we are all clear what I mean, I put stitches on the next picture.
P represents purl stitches. You can see the line of yarn wrapped around the front of the stitch. K represents knit stitches.
Finally, adding a few more rows will look like a rib. Let’s see if you can tell the difference between knit and purl stitches! I will help you a little. Remember, knit stitches form a “v” with the yarn and purl stitches look like little lines.
What is a knit stitch?
A knit stitch is one that you are already very familiar with making. We made our slip knot and it was our first stitch in knitting. And then we do more stitches.
Each of those cute little loops you put on your knitting needles is called a stitch.
What is a knit row?
Knit rows alongside your knitting needle. All these small stitches on your knitting needle make up a row. You’ll learn a lot about knit rows when we create a knit stitch pattern.
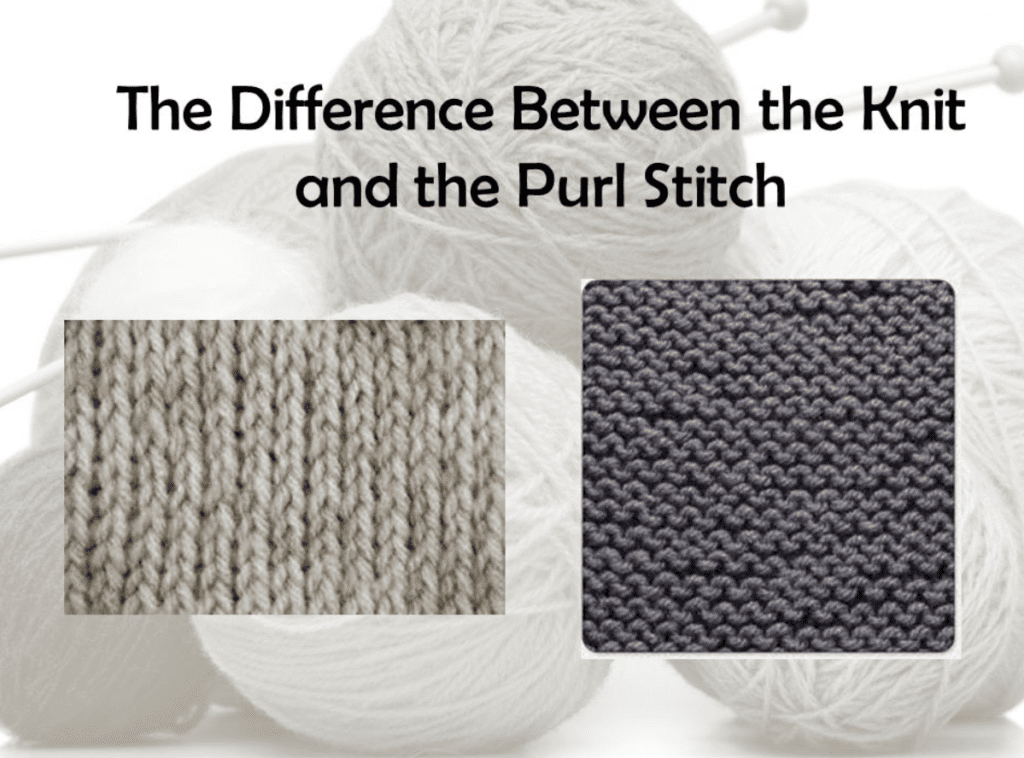
What is the difference between knit and purl stitch?
To understand the difference between knit and purl stitch, let’s see what “knit” and “purl” stitches look like. I’m using this knitting swatch, which alternates knit stitches with purl stitches.
Knit stitches and purl stitches are basically mirrored images of each other. The two stitches create a “bump” in the knitting. In a knit stitch, the bump is made on the back. The bump in pearl stitch is made towards the front.
You can look for “bumps” to see what was a knit stitch and what was a purl stitch. Knit and purl
As you can see, purl stitches have little horizontal “bumps” in front of them, while in knit stitch the yarn is rounded into a little “v” on either side. This is basically the difference between a knit and a purl stitch. Sounds simple but it’s a really important thing to learn. It will help you with the following stitch types.
A combination of knit and purl stitches
By combining knit and purl stitch sequences, you can create many different knits using just these two stitches.
For example, all four of these patterns look different, but they were created by changing how the knit and purl stitches “combine.”
What are all these different stitch types?
Garter stitch
Garter stitch is made by making one row of knit stitches, then turning and making another row of knit stitches.
This is a stitch that doesn’t really curl at the edges so it’s good for an edge piece.
You’ve probably noticed when you’ve been practicing knitting and purl stitches, that your fabric looks a bit like it did when you were knitting only or purl only.
Hopefully you’re now starting to see the difference between a knit and a purl stitch in action?
Stockinette stitch
Stockinette stitch is made by knitting a row of knit, then twisting to create a row of purls on the next row.
You will have all the “knitting” stitches on one side (without any stitches) and all the purl stitches on the other side. Because of this, stockinette has what is called a “knit” side and a “pearl” side. I have shown you the difference in the picture above.
If you look at most store-bought cardigans or jumpers, you’ll notice that they are made in stockinette stitch. Sometimes companies face the “bean” side out and sometimes they face the “pearl” side out. Both work well.
Go take a look in your closet, see if you can find something knitted using the stockinette stitch!
Note from me:
Stockinette will curl at the edges.
This is normal and there is not much you can do about it. It has to do with the different tensions that are knit and purl stitches. You will notice that garments made with stockinette stitch will have one more (non-curling!) stitch at the hem/collar/cuffs/edges. Often it is the rib, which does not rotate.
Rib stitch
Rib stitch alternates purl stitches and purl stitches in a single row. This is where it starts to become very important to understand the difference between knitting and purl stitch.
In this swatch I made 2 knit stitches, then two purl stitches, then 2 purl stitches, etc. This is often called “2×2 ribbing” because there are 2 stitches of each type.
You can do any number of combinations though. “1×1 ribbing” would be 1 knit and 1 purl. You can even mix it up and do 3 knits then 1 purl then 3 knits.
Rib stitch
Like garter stitch, the ribbing does not curl.
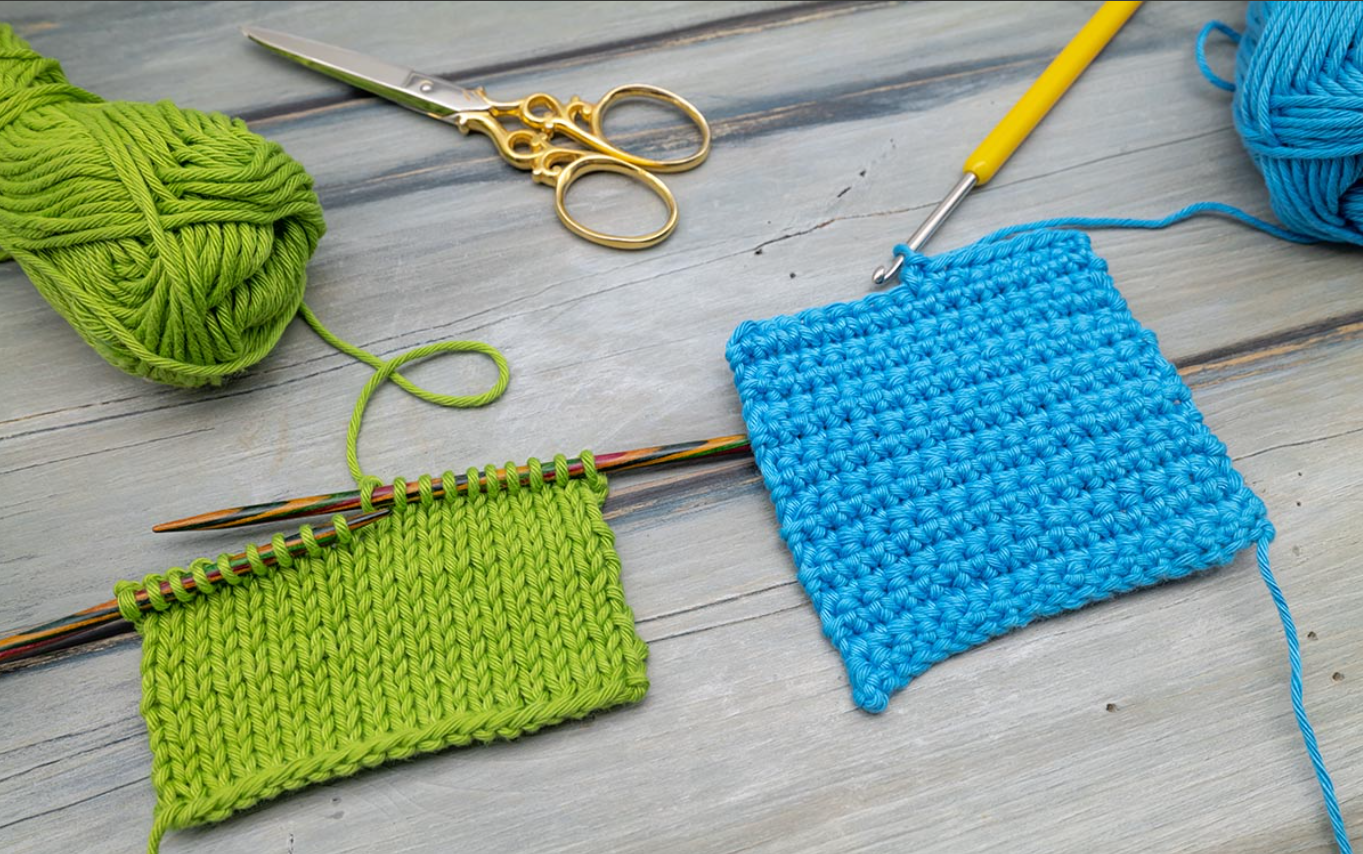
Tip from me
The rib is also much more stretched than the other stitches. It makes good for the cuff. In this example below, the swatches (knitting test pieces) are made using the same size needles and the same number of stitches. Look how short the rib is!
Ribbing is a stitch that gets used a lot so check out this video where I explain exactly how to knit 2×2 ribbing.
Moss stitch
In moss stitch, you alternate 1 knit stitch with 1 purl stitch. As with the rib stitch, it can be tricky if you don’t know the difference between knit and purl stitches. Which hopefully you will now!
In Moss stitch, you’ll add a purl over a knit, to create this messy texture. So if I’m making something in moss stitch, I’ll check the bottom row to make sure I know which stitch to do. Instead of meeting purl bumps, though, if I saw a purl bump, I’d make one. This is what creates this interesting structure.
How to count rows and stitches
Along with understanding the difference between knit and purl stitches, you need to understand how to count rows and stitches. This is especially important when you are following a pattern.
· Counting stitches
Let’s look at the stitch count first. Stockinette stitch is the easiest to understand. Check out this sample below. You’re looking for little “v” signs. Each of them is stitched.
· How to count rows
Each row is made up of a set of stitches. The queues will always cross like this. So this is a row of stitches.
Knitted stitch vs Purl stitch vs Garter stitch
Knitted stitch
When the stitch is made, the fur yarn is behind the needles. Knit stitches are made by sewing on the needle in your left hand and inserting the needle in your right hand. When making a knit stitch, the right needle enters the stitch from the left front and exits from the right back. Wrap the yarn counterclockwise around the right needle you inserted, pull the wrapped yarn through the stitch and onto the right needle, then drop the worked stitch off the left needle.
Purl stitch
When purl is stitched, the fur yarn is in front of the needles. You insert the right needle over the left needle from the front of the stitch from right to left. After wrapping the yarn counterclockwise around the right needle, you push the right needle back through the stitch to complete the purl. The wrap stays on the right needle and you drop the cleaned stitch off the left needle.
Garter stitch
Garter stitch is the fabric pattern you create as you knit each stitch in each row. This is usually the first stitch pattern that beginning knitters learn, as it does not require a hoop. Knit stitch is a technique, but garter stitch is a pattern. Garter stitch looks like rows of pieces of fabric, whether you’re looking at the front or back of the work. Knitters often speak of right-side and wrong-side rows. The right side is the outside of a knitted piece; The wrong side is inside. In garter stitch, right sides and wrong sides look the same.
Alternate knitting and pearls
When you alternate knitting and purl stitches, you create more complex patterns. By knitting all the rows on the right side and purging all the wrong side lines, a fabric called stockinette is created. Purl rows on the wrong side look like garter stitch, but columns and rows on the right look like a V pattern. When you make a stitch or two, then make a stitch or two and change the pattern in each row, you create stretchy ribbing, like you see on the neck and cuffs of sweaters. Once you know how to knit and purl, the world of knitting is your oyster.
Composition:
Knit: Knit stitches are worked from front to back.
Purl: Purl stitches are made from back to front.
Front vs Back:
Knitting: The back of the pearl looks like the front of the pearl.
Purl: The back of a purl looks like the front of a knit.
Visual effects:
Knit: Knit stitches look like a vertical “V”.
Purl: Purl stitches look like wavy horizontal lines across the fabric.